
IBPS Photo Resizer
Resize Photo, Signature, Thumb & Declaration · No upload to any server
badge Filename Options
image Image Preview
pending Ready for uploadIBPS Handwritten Declaration
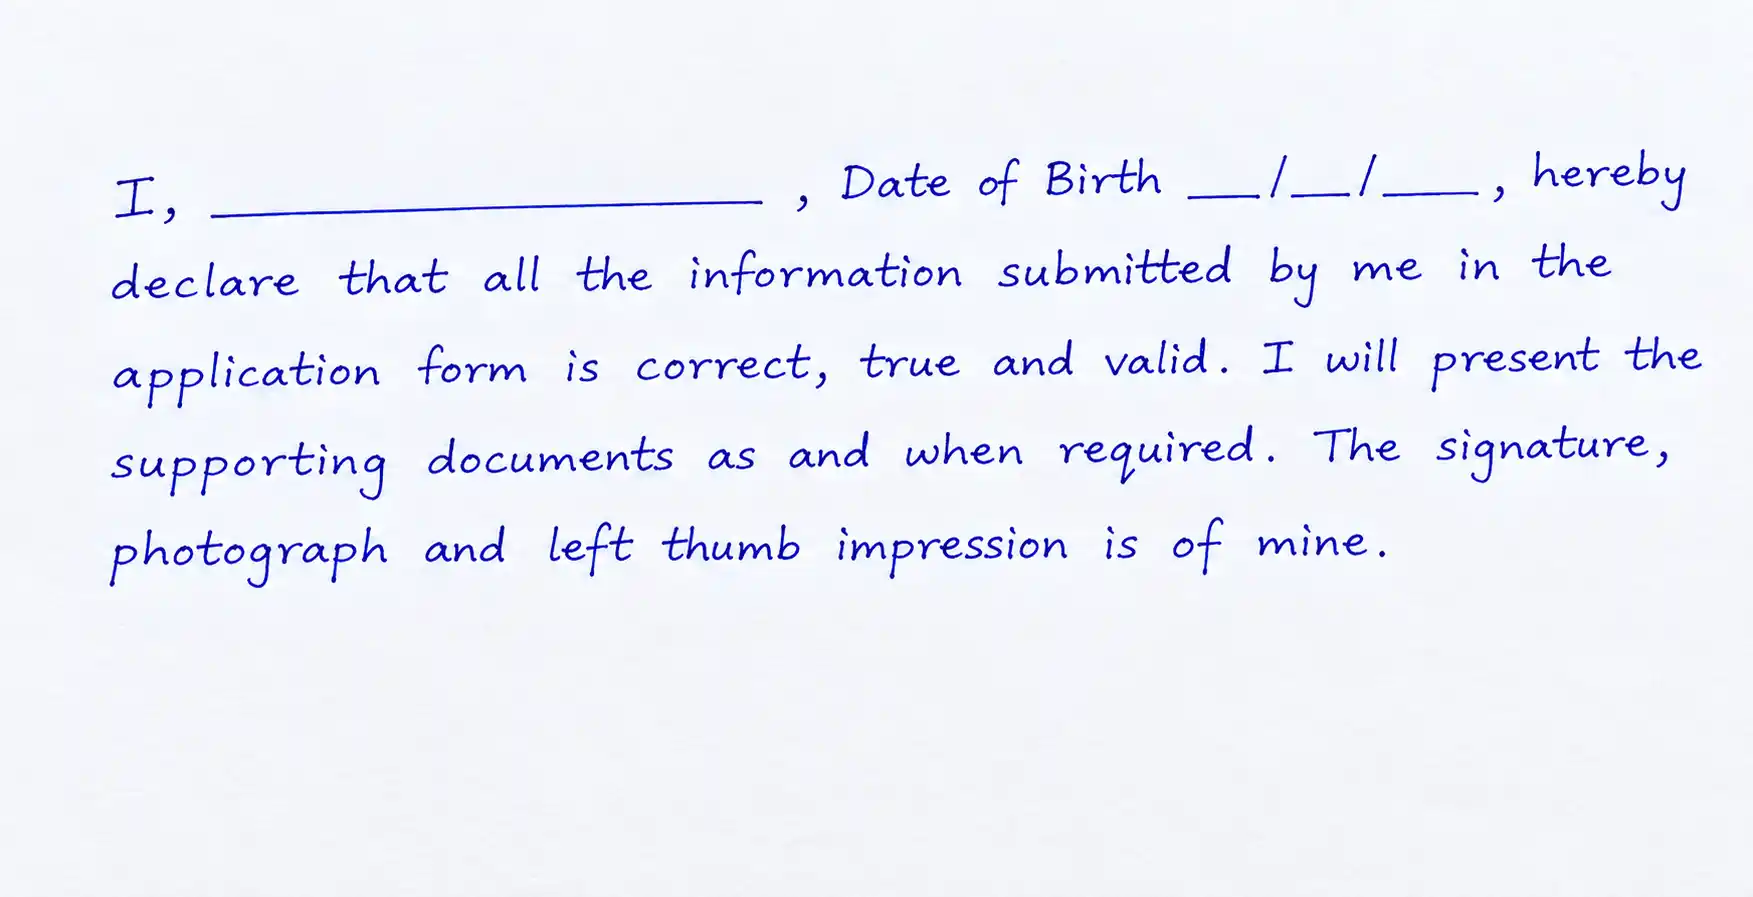
IBPS Hand written Declaration — Write the same text in your own handwriting on white paper, then upload it here.
Crop Photo
200 × 230 px
More Controls
IBPS Photo Resizer: Resize Photo, Signature, Thumb Impression & Declaration Online
IBPS Photo Resizer helps applicants prepare four commonly required documents for banking recruitment applications: a photograph, signature, left thumb impression and handwritten declaration. Instead of using a general image editor and checking every specification manually, you can process each document through its own workflow.
The basic process is simple: Select → Upload → Crop → Apply → Validate → Download. The IBPS Photo Resizer is designed for browser-based processing so each document can be handled independently, with its own dimensions, target KB range and validation rules.
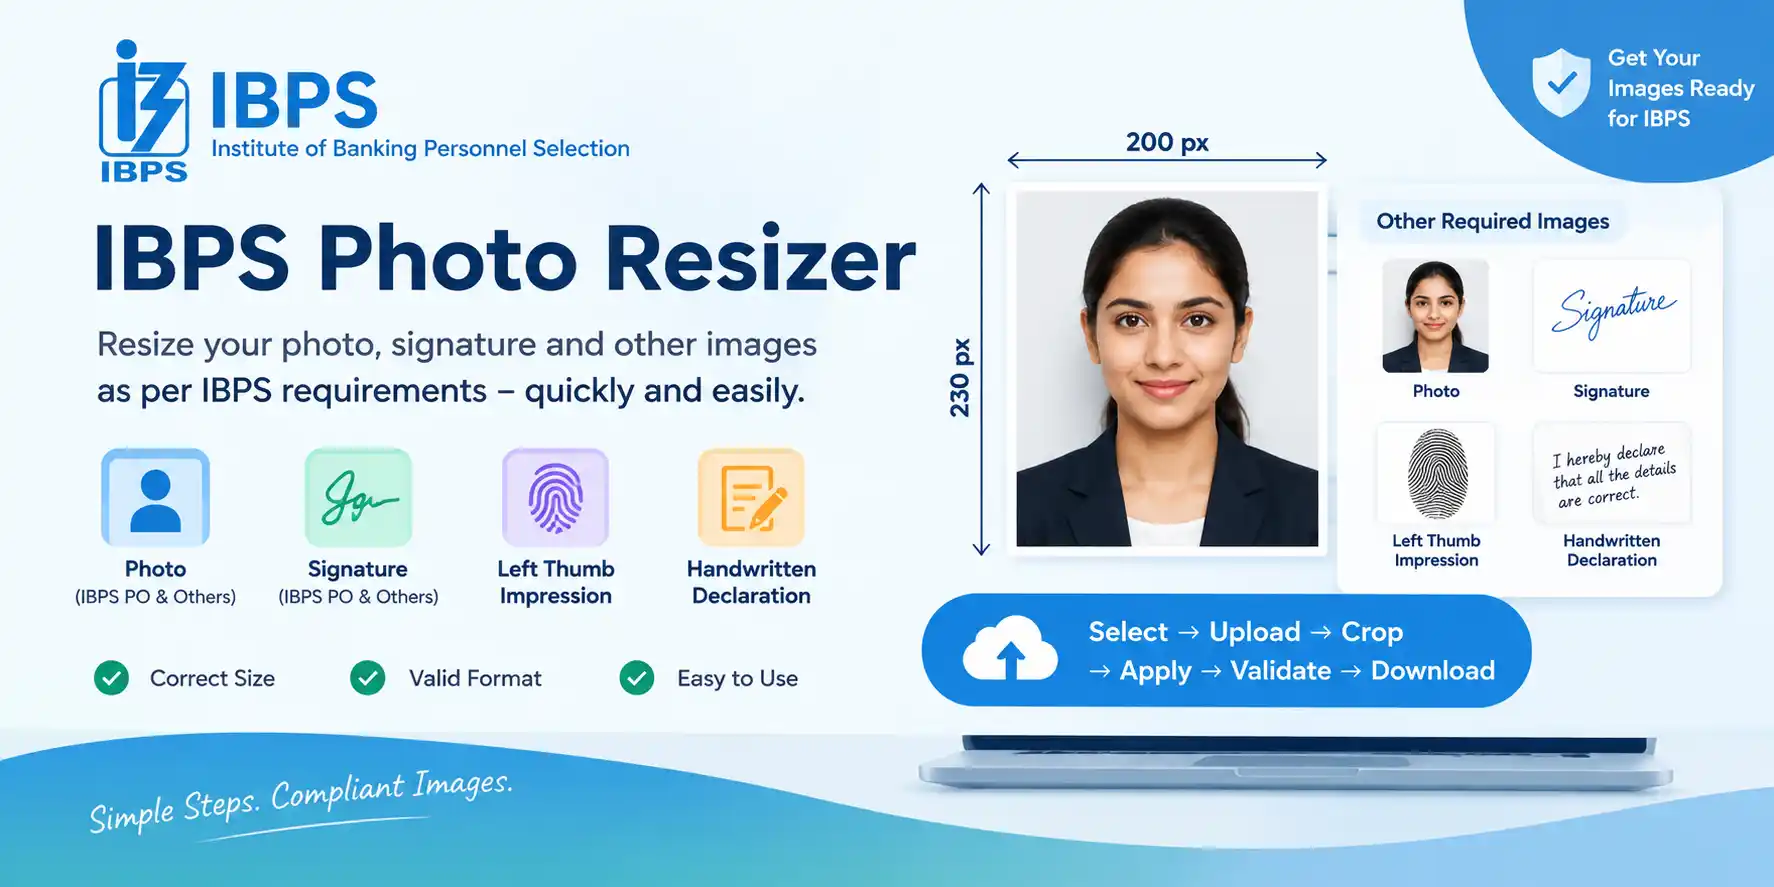
Prepare all four IBPS application documents in one place with the IBPS Photo Resizer.
Important: IBPS recruitment instructions can change between notifications. The specifications shown on this page are the settings used by this tool. Before submitting an application, compare your final files with the latest instructions published by the official IBPS website and the relevant recruitment notification.
IBPS Photo, Signature, Thumb & Declaration Size
The four documents have different requirements. Dimensions, file size, format and DPI should be treated as separate checks. A file can have the correct pixel dimensions but still be outside the permitted KB range, so always validate the final exported file rather than relying only on the preview.
| Document | Dimensions | File Size | Format | DPI |
|---|---|---|---|---|
| Photograph | 200 × 230 px | 20–50 KB | JPG / JPEG | Not specified by this preset |
| Signature | 140 × 60 px | 10–20 KB | JPG / JPEG | Not specified by this preset |
| Left Thumb Impression | 240 × 240 px | 20–50 KB | JPG / JPEG | 200 DPI |
| Handwritten Declaration | 800 × 400 px | 50–100 KB | JPG / JPEG | 200 DPI |
These values are the practical presets used in the IBPS Photo Resizer. If the recruitment notification you are applying under gives different values, follow that notification. The official instructions take priority over any generic online guide.
What Is an IBPS Photo Resizer?
An IBPS photo resizer is a document-preparation tool designed around the image requirements commonly used in IBPS online applications. A normal photo editor may let you change width, height and JPEG quality, but you still have to calculate the correct settings and repeatedly inspect the result.
The important part is not simply making an image smaller. The image needs to be cropped to the correct composition, resized to the target pixel dimensions, exported in the requested format and brought inside the required file-size range. For documents such as the thumb impression and handwritten declaration, the tool can also preserve the specified DPI value.
Separate processing is especially useful because a photograph and a signature do not use the same aspect ratio. A square thumb impression and a wide handwritten declaration need completely different crop areas. Keeping these workflows independent also prevents an uploaded image from accidentally appearing in another document section.
IBPS Photograph Size: 200 × 230 Pixels
The photograph preset in the IBPS Photo Resizer is 200 × 230 pixels with a target file size of 20–50 KB in JPG/JPEG format. The crop should preserve the applicant's face and required visible portion of the photograph without cutting the head, chin or important shoulder area.
Before Resizing
- Use a clear, recent photograph.
- Keep the face clearly visible.
- Avoid excessive filters or heavy retouching.
- Use suitable, even lighting and avoid strong shadows.
After Resizing
- Confirm 200 × 230 px.
- Confirm 20–50 KB.
- Confirm JPG/JPEG format.
- Open the downloaded file and inspect it at normal size.
Do not judge the result only from the crop preview. The exported file is what you will eventually select during the application process, so the final dimensions and KB value are the important checks.
IBPS Signature Size: 140 × 60 Pixels
The signature preset in the IBPS Photo Resizer is 140 × 60 pixels with a target of 10–20 KB in JPG/JPEG format. The signature should remain readable after resizing. Avoid leaving a large amount of unnecessary blank space around the writing because it can make the actual signature appear too small.
Use a clean signature written with a suitable dark pen on a plain background. During cropping, keep the complete signature inside the crop area while removing excessive margins. If the source photograph of the signature is uneven or tilted, correct the crop and orientation before applying the final dimensions.
Because the signature file is small, aggressive compression can make thin strokes unclear. Check the final JPEG rather than assuming that a smaller KB value is automatically better.
IBPS Left Thumb Impression Size: 240 × 240 Pixels
The left thumb impression preset is 240 × 240 pixels, 20–50 KB, JPG/JPEG format and 200 DPI. The square dimensions mean that the crop should be balanced rather than using a wide or tall source area.
Start with a clear thumb impression that is neither excessively dark nor too faint. Keep the complete impression visible and avoid cropping away its edges. After processing, confirm that the generated file remains legible and that the final file properties match the required preset.
DPI is separate from pixel dimensions. A 240 × 240 image can still have a different embedded DPI value. For this preset, the IBPS Photo Resizer should therefore handle both the pixel size and the 200 DPI metadata requirement.
IBPS Handwritten Declaration Size: 800 × 400 Pixels
The handwritten declaration preset is 800 × 400 pixels, 50–100 KB, JPG/JPEG format and 200 DPI. The declaration is wider than the thumb impression, so the crop should preserve the complete writing from one side to the other.
Write the declaration exactly as required by the current recruitment notification. Do not shorten, rewrite or replace the required wording based on an old sample. Use clear handwriting and make sure no line is cut off by the crop. The complete declaration should remain readable in the final image.
Before downloading, check the width and height, file size, format and DPI. A declaration that looks correct in the preview can still fail a technical upload check if its final file size or dimensions are outside the permitted range.
How to Resize Your IBPS Application Images
- Select the document type. Choose Photo, Signature, Left Thumb Impression or Handwritten Declaration.
- Upload the correct source image. Keep each source file associated with its own section so documents are not mixed.
- Crop the image. Adjust the crop area to include the required content and remove unnecessary blank space.
- Fine-tune the crop. Use zoom, pan, rotate or straighten controls when needed. Keep the crop interface simple enough to review before applying it.
- Apply the target dimensions. The selected preset sets the required pixel width and height for that document.
- Control the file size. Adjust JPEG compression until the generated file falls inside the target KB range.
- Validate the result. Check dimensions, file size, format and DPI where applicable.
- Download the final file. Save each document with a clear filename and keep the originals until the application is successfully completed.
The IBPS Photo Resizer keeps each document on its own workflow, so processing one file reduces mistakes in the others. For example, a 200 × 230 photograph should never be processed through the 800 × 400 declaration preset.
How the Tool Controls Image Size in KB
Pixel dimensions and file size are two different properties. Dimensions describe how many pixels are in the image, while the KB value describes how much storage the exported file uses. JPEG compression is one of the main factors that changes the final file size.
Two images with identical dimensions can have different KB values because their visual content and JPEG quality are different. A detailed photograph may compress differently from a mostly white signature or declaration. That is why simply setting width and height is not enough when an application specifies a KB range.
The practical workflow is to first establish the correct crop and pixel dimensions, then adjust compression, and finally inspect the generated file size. Aim to stay comfortably inside the allowed range rather than relying on a value that is only barely within the boundary.
Why 200 DPI Matters for Some IBPS Documents
DPI means dots per inch. In digital image workflows, DPI is commonly stored as metadata that describes the intended print density. It is different from the pixel dimensions of the image.
For the thumb impression and handwritten declaration presets, the IBPS Photo Resizer uses 200 DPI in addition to their specified pixel dimensions. Changing DPI alone does not create more detail or repair a low-quality source image. A clear source and correct pixel dimensions remain important.
If an application system checks embedded DPI metadata, the final exported file should contain the required value. This is why DPI validation is useful as a separate step instead of assuming that the displayed pixel dimensions automatically imply a particular DPI.
Prepare and Download All Four IBPS Documents
When preparing several application images, organize them before uploading. Keep the original photograph, signature, thumb impression and declaration as separate files. This makes it easier to identify the correct source and reduces the chance of accidentally processing the wrong image.
- Use a descriptive filename such as ibps-photo.jpg, ibps-signature.jpg, ibps-thumb.jpg and ibps-declaration.jpg.
- Review every generated file independently.
- Check the actual downloaded file rather than only the on-screen preview.
- Keep the original files until the online application has accepted the uploads.
- If the notification gives a newer specification, use the notification rather than an older preset.
A Download All option can save time when all four files are ready, but convenience should not replace validation. Open or inspect each generated file before submitting the application.
Common IBPS Image Errors to Avoid
Wrong Dimensions
The file may look correct but still fail if its width or height does not match the required pixels.
Wrong KB Range
A correct pixel size can still produce a file that is too large or too small after JPEG export.
Incorrect Crop
Cutting the head, chin, signature strokes, thumb edges or declaration lines can make the document unsuitable.
Unreadable Content
Excessive compression, faint ink or poor lighting can reduce readability even when the technical size is correct.
Wrong Document Preset
Each section has different dimensions. Always select the document type that matches the uploaded source.
Outdated Instructions
Online guides can become old. Verify the current recruitment notification before final submission.
Tips for Preparing a Better IBPS Photograph
- Use a recent photograph with the face clearly visible.
- Choose even lighting so the face is not hidden by harsh shadows.
- Avoid unnecessary filters, extreme smoothing or effects.
- Keep the crop balanced and do not cut important facial or shoulder areas.
- After export, verify both the image dimensions and KB range.
- Open the downloaded JPG/JPEG before uploading it to the application portal.
Tips for Signature, Thumb Impression and Declaration
- Keep the signature dark, clear and fully inside the crop area.
- For the thumb impression, use a clean impression with enough contrast to remain visible after compression.
- For the declaration, follow the exact wording and instructions in the current notification.
- Make sure every line of the declaration is visible and not cut by the crop.
- For thumb and declaration presets, confirm the 200 DPI requirement as well as pixels and KB.
🔒 Browser-Based Processing and Privacy
The IBPS Photo Resizer is designed around client-side browser processing. In a browser-first workflow, image operations can be performed locally instead of requiring the source image to be sent to a remote image-processing service. This can be useful when preparing personal application documents.
Even when a tool is designed for local processing, users should review the current privacy information and browser behavior before using any online service. Do not upload sensitive documents to an unfamiliar service merely because it claims to be free.
IBPS Photo Resizer vs Manual Image Editing
A general image editor can resize an image, but preparing an application document manually often means switching between crop tools, resize dialogs, JPEG quality settings and file-property checks. The required values also differ for each document.
The IBPS Photo Resizer brings those tasks together through document-specific presets. The benefit is consistency: the photograph uses one target, the signature another, the thumb impression another, and the declaration another. This reduces repeated calculations and makes it easier to identify which requirement still needs attention.
Manual editing can still be useful when an applicant needs advanced retouching or a custom workflow. For straightforward application preparation, however, a guided preset-based workflow can reduce unnecessary steps.
Frequently Asked Questions
This tool uses 200 × 230 pixels and a 20–50 KB target for the photograph. Always compare the final requirement with the latest IBPS recruitment notification.
This tool uses 140 × 60 pixels and a 10–20 KB target for the signature. Check the current notification before submission.
This tool uses 240 × 240 pixels, 20–50 KB and 200 DPI for the left thumb impression.
This tool uses 800 × 400 pixels, 50–100 KB and 200 DPI for the handwritten declaration.
Yes. Photo, signature, thumb impression and declaration have separate upload, crop, resize and validation workflows.
Pixel dimensions and file size are different properties. JPEG quality and image content affect the final file size, so the exported file must be checked against the required KB range.
Changing the DPI value does not by itself add image detail. Pixel dimensions determine the digital image dimensions, while DPI is metadata describing print density.
The tool is designed for browser-based client-side processing. Review the current privacy information on the site before using any online tool.
How to Check Your IBPS Files Before Uploading
A final technical check is worth doing before you begin the application upload. First, make sure the file opens normally and is saved in JPG or JPEG format. Next, confirm the exact pixel dimensions. After that, check the file size in KB and, where required, verify the embedded DPI value. These checks should be performed on the downloaded output, not only on the source image or editor preview.
It is also useful to compare the visual result with the original. The photograph should still look natural and recognizable, the signature should remain readable, the thumb impression should be clear, and every line of the handwritten declaration should remain visible. If compression has created obvious artifacts or made thin writing difficult to read, prepare the image again rather than choosing a technically valid but poor-quality file.
Keep a small checklist for all four documents: correct document, correct crop, correct dimensions, correct KB, correct format and correct DPI where applicable. This simple review can prevent a last-minute replacement of files while completing the online application.
Why Separate Crop and Validation Controls Matter
Each IBPS document has a different shape and purpose, so a single crop setting is not suitable for all four files. The photograph needs a portrait-oriented crop, the signature needs a short horizontal crop, the thumb impression needs a square crop, and the declaration needs a wider rectangular crop. The processing state should therefore remain independent for every section.
Independent controls also make the workflow easier to correct. If the signature crop is wrong, you should be able to change only the signature without resetting the photograph or thumb impression. Similarly, validation messages should belong to the selected document and show exactly which requirement needs attention.
This approach is particularly useful when several images are prepared in one session. Clear section labels, separate previews and document-specific validation reduce confusion and make the final Download All step more reliable.
What to Do If the File Is Outside the Required KB Range
If the exported image is larger than the permitted range, review the crop first and then adjust JPEG compression. Removing unnecessary blank space can sometimes reduce the visual complexity of the image, but the main control is the export quality. If the file becomes smaller than the minimum, increase the JPEG quality and export again.
Do not repeatedly resize the already-compressed output. Whenever possible, return to the original source and generate a fresh final file. Repeated JPEG recompression can gradually reduce image quality, which is especially noticeable in small signatures and handwritten documents.
The goal is not simply to obtain the smallest possible file. The final image should satisfy the technical range while keeping the important content clear and readable.
Prepare Your IBPS Images
Use the IBPS Photo Resizer to prepare your photograph, signature, left thumb impression and handwritten declaration using separate document-specific presets. After processing, verify every final file against the current recruitment instructions before uploading it.
IBPS Photo Resizer supports all four documents:
✓ Photo · ✓ Signature · ✓ Left Thumb Impression · ✓ Handwritten Declaration